Overview
The General Settings panel controls the core behavior of Tailwind CSS Builder across your WordPress site. Here you can enable or disable the builder for specific post types, configure performance options, and manage site-wide preferences.
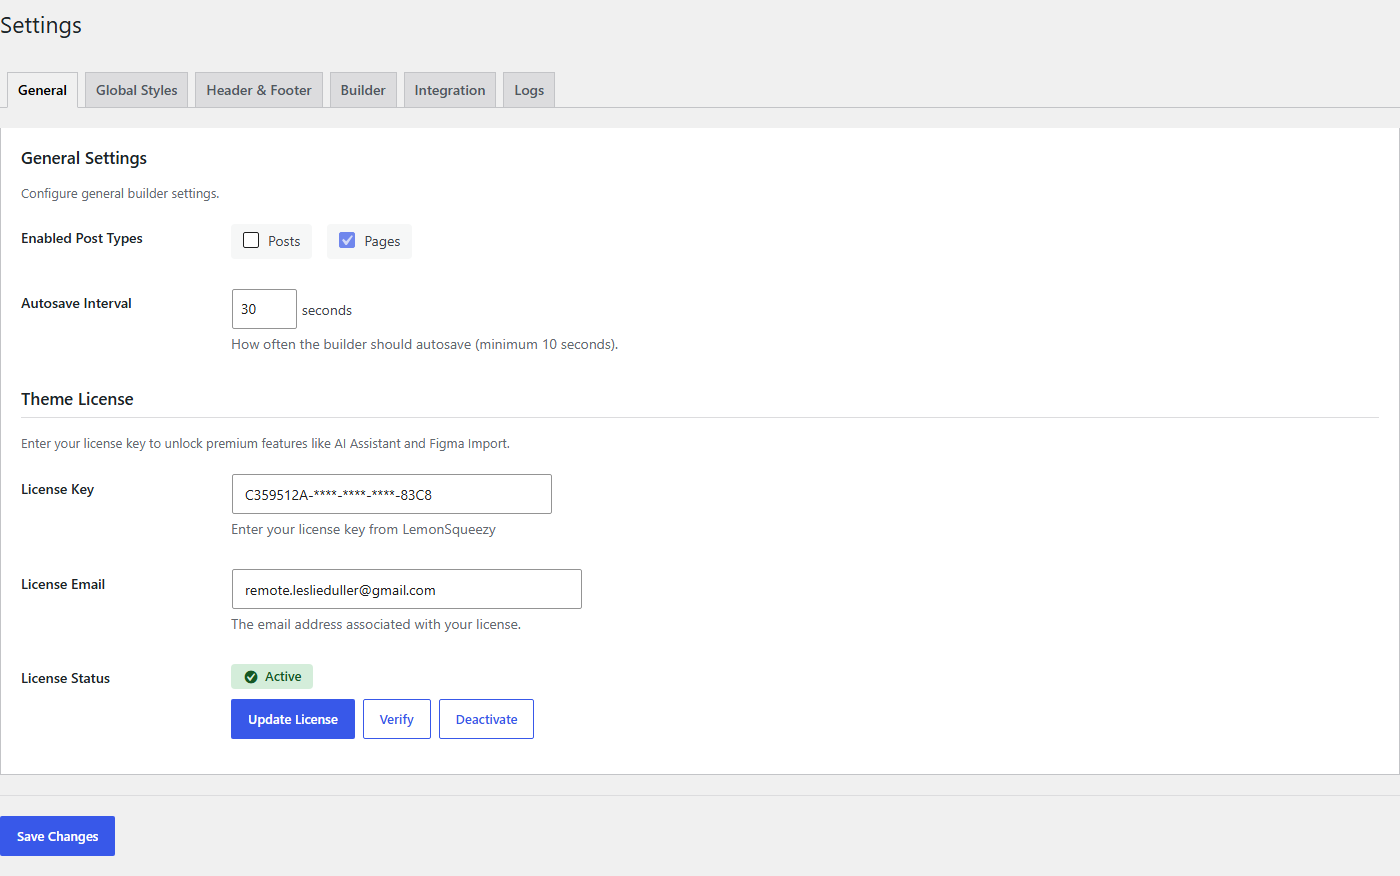
To access General Settings, navigate to TW Builder > Settings in the WordPress admin menu. The General tab is selected by default.
Settings Reference
The following table describes each setting available in the General panel:
| Setting | Description | Default |
|---|---|---|
| Enable TW Builder | Master toggle to enable or disable the page builder site-wide. When disabled, pages will render using their saved content but the builder interface will not be available. | Enabled |
| Post Types | Select which post types can use the page builder. Check the boxes next to each post type you want to enable. Common choices include Pages, Posts, and any custom post types registered by your theme or plugins. | Pages only |
| Performance Mode | Defers loading of builder JavaScript until the editor is opened. This improves WordPress admin performance when you're not actively using the builder. | Disabled |
| Load Tailwind Play CDN | Loads the Tailwind CSS Play CDN for instant class compilation. Useful for development and prototyping. For production, use a build process to generate optimized CSS. | Enabled |
Enable TW Builder
The Enable TW Builder toggle is the master switch for the entire plugin. When enabled:
- The builder interface appears on posts and pages (based on Post Types setting)
- Custom headers and footers are rendered on the frontend
- Page-specific CSS and JavaScript from the builder are loaded
When disabled:
- The builder interface is hidden from all posts and pages
- Existing page content is still rendered (your pages won't disappear)
- Headers and footers fall back to your theme's defaults
- Builder-specific CSS and JS are not loaded on the frontend
Disabling the builder does not delete any of your content. Your pages, headers, footers, and components are all safely stored and will be available when you re-enable the builder.
Post Types Configuration
The Post Types setting lets you choose exactly which content types can use the page builder. By default, only Pages have the builder enabled.
Standard Post Types
- Pages - WordPress pages (recommended for landing pages, about pages, etc.)
- Posts - Blog posts (enable if you want visual blog layouts)
Custom Post Types
If your theme or plugins register custom post types, they will appear in this list. Common examples include:
- Products (WooCommerce)
- Portfolio items
- Team members
- Testimonials
- Events
Some plugins expect their custom post types to use specific templates. Enabling the builder for these post types may override their default layouts. Test carefully before enabling the builder for plugin-managed post types.
Performance Options
These settings help optimize WordPress admin performance, especially on sites with many pages or plugins.
Performance Mode
When Performance Mode is enabled, the builder's JavaScript files are only loaded when you actually open a page in the builder. This reduces the initial load time of the WordPress admin and post editor screens.
Enable this option if you notice slow loading times in the WordPress admin, especially when:
- Your site has many plugins installed
- You're working on a shared hosting environment
- You frequently edit posts that don't use the builder
Load Tailwind Play CDN
The Tailwind Play CDN provides real-time compilation of Tailwind CSS classes. This is convenient during development because any Tailwind class you use will work immediately without needing a build step.
For production sites, consider:
- Disabling this option to reduce external dependencies
- Using a proper build process with PurgeCSS for smaller CSS files
- See the Integrations page for Tailwind CSS build configuration
Saving Changes
After making changes to any settings:
- Review your changes - Double-check the settings you've modified
- Click "Save Settings" - The button appears at the bottom of the settings panel
- Wait for confirmation - A success message confirms your settings have been saved
Changes take effect immediately. You don't need to clear caches or refresh the page (though doing so won't hurt).